Cooking Up Some Dough

Making Extra Cash from Your Kitchen

  • Home
  • About
  • Blog
  • Courses
  • Freebies

How I’m Making Extra Money for the Holidays

October 10, 2016 by cookingupsomedough Leave a Comment

For the past several weeks retail stores have been announcing that they are hiring for the holiday season. Of course, they’ll be paying minimum wage.

If you’re one of the people considering how to make extra money for the holidays, you might be considering getting a part-time job. What if, instead of trading your time for little pay and a less than ideal work schedule, you took control over how you will make money? What if you used your cooking skills to bring you cash?

The two most common questions I get from people when I suggest this is “But, what should I make?” and “Who would I sell to?”

I thought it might be fun to turn these questions into a 5-Day Challenge to help you get your answers. I’d love for you to join me as we go From Pan to Profit.

And I would love for you to join me. I’ll be participating just like you. I want to make a few extra dollars for the holiday season and I have an idea of what I want to make but I haven’t thought it all the way through and I haven’t decided who I’ll sell to. I’m interested in seeing if my product changes and how it will come to life during this challenge.

I’ll be sending out emails every day during the 5-day challenge with tasks to complete for that day. I’ll also be checking in on our private Facebook group every day where we can all have some accountability, ask questions and then share what we’re doing.

The challenge will start on Tuesday, October 25th and end over the Halloween weekend. On Day 4 you will be cooking or baking the dish that you decide upon during the challenge and serving it. If you are hosting a party or going as a guest, this is the perfect time to let others taste your food and see what you have to offer.

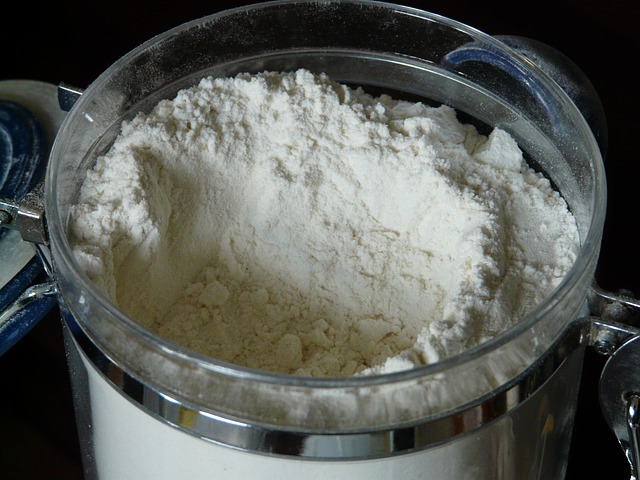
I hope you will join me in the challenge. To get more details and to sign up, click the image below.

From Pan to Profit 5-Day Challenge. Find Products to Sell and Customers that Will Buy


7 Baking Fails and How to Avoid Them

September 22, 2016 by cookingupsomedough Leave a Comment

7 Baking Fails and How to Avoid Them

Buzzfeed – you left us hanging! You showed us the painful (but familiar) disasters that sometimes happen when we bake but you didn’t show us how to avoid the mistakes that cause them.

In an effort to rescue home cooks everywhere from committing these baking crimes, I’ve collected the videos below to give you an education on how to avoid common baking fails.

1.Blob Cookies

In addition to placing your cookies farther apart on the tray, Beeta Hashempour recommends that we refrigerate our cookie dough before baking.

2. Scorched Biscuits

Prevent scorching your biscuits and cookies by using a good quality baking pan (avoid the dark pans), baking on the middle rack of your oven and making sure your oven temperature is correct.

3. Cake Sticks to Pan

You can make sure that your cake releases from the pan by preparing your pans properly before cooking. Watch the video below from Allrecipes – just don’t forget to remove the parchment paper from the cake.

If you want to save a step, you can purchase pre-cut parchment circles that fit your pan.

4. The Deflated Cake

Cakes that fall in the middle most likely have had the cooking process interrupted in some way. You’ve either taken the cake out of the oven too soon or opened the oven too early or too often during the baking process and interrupted the cooking.


5 and 6. Cracked Cake and Crumbling Cake

There could be several reasons that your cake cracks or crumbles. First, check your oven temperature to make sure that it is not too high. Next, be sure to measure the ingredients properly. Also avoid over-mixing your ingredients. If all else fails, your cake will still be delicious as cake balls or a trifle.


7. Melting Icing

Frosting a cake that is still warm will cause the icing to melt. Watch the video below from America’s Test Kitchen for the proper way to frost a cake.


Cherry Chip Celebration Cake with Hershey’s Birthday Cake Kisses

September 13, 2016 by cookingupsomedough 9 Comments


hersheys-birthday-cake-kisses-cake

Since last week, when I used my Facebook group to report the introduction of the new Hershey’s Birthday Cake Kisses, I’ve been waiting to make this cake. The Kisses weren’t due to arrive in Walmart until today, September 12th, but there was a rumor that the candy had been spotted on store shelves a little early. Unfortunately, no stores in my area carried them.

When I heard about the Kisses, I immediately wanted to create a special dessert. I considered trying a thumbprint style cookie but no one flavor of cookie stood out to me as a flavor profile to pair with the white chocolate Kiss. I recalled a conversation that I’d recently had with my cousin about the little known practice of bakeries using a boxed cake mix and adding a few ingredients to the batter for a richer taste. This would be a perfect opportunity to test one of those cakes. For some reason, the color pink came to mind.

I thought about using sprinkles in the cake to mirror the sprinkles that were supposed to be in the Kisses. But then, I remembered the look of a cake that was probably out in the 70s. It was a Cherry Chip Cake. I thought it would complement the new Kisses perfectly. Keep in mind that as I’m planning this cake, I still haven’t actually seen or tasted the new Kisses.

I went on the hunt for the Cherry Chip Cake mix and discovered that it was very difficult to find. As I stood in the store searching for a solution, I decided to try a white cake mix and add maraschino cherries to it. I came home and searched for tips to make a box mix taste like homemade. Some of the tips called for so many additional ingredients that I might as well have started the recipe from scratch. There were a number of tips however that called for eggs, butter and milk. So, I made the cake a day in advance and I’m writing this as I wait for the stores to stock their shelves.

I wanted a pink frosting with the color and flavor coming from the maraschino cherry juice. Searching through Pinterest, I found a great recipe for Maraschino Cherry Frosting at Mom On Time Out. Because I am sensitive to almonds I substituted an Imitation Clear Vanilla extract so as not to muddy the color.

Update: The Kisses are here! I cut some of the kisses in half from the top to show the confetti look inside. I then randomly scattered them around the cake, pressing them into the frosting. Next I added sprinkles for an even more festive look. Here’s an up close look at the inside of the kisses and the maraschino cherry chips inside the cake.

Cherry Chip Celebration Cake with Hershey's Birthday Cake Kisses


This cake is delicious but it is very sweet. With the richness from the eggs, butter and milk, giving the taste of homemade, and the overload of candy, you can only have a small slice. The cake definitely lives up to its’ name – Celebration Cake.


Cherry Chip Celebration Cake with Hershey’s Birthday Cake Kisses

Created by cookingupsomedough on September 12, 2016

Cherry Chip Celebration Cake with Hershey's Birthday Cake Kisses

Ingredients

For the Cake

  • 1 package White Cake Mix
  • Replace water with equal amount of milk
  • Replace oil with butter and double the amount
  • 1 additional egg
  • 1 teaspoon vanilla
  • 2 tablespoons cherry syrup from maraschino cherries (from jar below)
  • 10 fluid ounces jar maraschino cherries, drained, stemmed and finely chopped (reserve syrup)

For Decorating

  • Buttercream Frosting
  • Sprinkles or Confetti shaped edible decorations
  • 2 packages Hershey's Birthday Cake Kisses

Instructions

  1. Mix cake according to package directions, making the addition of the egg and replacing oil and water with melted butter and milk. Add the vanilla and cherry syrup and mix.
  2. Stir in the maraschino cherries by hand. Bake cake according to package directions.
  3. While the cake is baking, make your buttercream frosting. Refrigerate.
  4. Unwrap the candy kisses. Cut about 40 in half. Set both aside until ready to decorate.
  5. After the cake has completely cooled, lay strips of parchment or wax paper around the edges of the cake stand. Add a dollop of icing in the center of the plate and lay the first layer of the cake on top. The icing anchors the cake and prevents it from sliding as you decorate and the paper strips keep the plate edges clean. Give both layers a crumb coat and refrigerate about 30 minutes until buttercream is firm.
  6. Ice cake again generously with the buttercream. Gently press sprinkles into the side of the cake. Press kisses randomly into the sides of the cake, adding a few of those that have been cut so that inside is facing outward. After decorating the sides, add kisses to the top of the cake. Add sprinkles to the top to cover the spaces between the kisses.
  7. Once your icing and decorations are complete, gently pull the paper strips from under the edges of the cake.
  8. Enjoy!
  • Print

Freebies

September 12, 2016 by cookingupsomedough Leave a Comment

Coming Soon! 

Courses

September 12, 2016 by cookingupsomedough Leave a Comment

Coming Soon! 

Make Extra Money for the Holidays

September 7, 2016 by cookingupsomedough 1 Comment

Make extra money for the holiday season

The calendar is moving towards that time that is called the “most wonderful time of the year”. As we approach the last quarter of the year, people are in a celebratory mood and will be entertaining with parties and family gatherings. And what is served at parties? FOOD!!!

I’m hosting a Holiday Planning Party where I will show you how you can make extra money from your home kitchen during this holiday season. October to December are the most lucrative time for retailers and it can be for you too if you’re able to supply the food that is so important for holiday celebrations.

It was during this time in 2008 that I formally launched the concept of Cooking Up Some Dough. I was in a really tough financial situation and needed to make money fast but didn’t have the time to give to an outside job. I decided to bake cookies for the holiday season and $900 later, I realized that I had a system for making money from my home kitchen.

Let me show you how you can use your home kitchen to make extra money for the holidays.

If you want to reduce the amount of stress that you feel trying to find extra money for holiday gifts or meeting year-end obligations, please join me for a planning party and webinar entitled Cooking Holiday Cash. During our Planning Party, you’ll learn:

  • WHAT you need to do to prepare
  • WHERE to find your customers
  • THREE SPECIFIC ways you can start making money

Plus, you’ll receive a Planning Calendar and a few other bonuses just for attending.

The time to plan for the holidays is now. Register now for the Planning party and turn your love for cooking into cash this holiday season.

register-now


In A Pinch – Kitchen Hacks for What To Do When You’re Ready to Cook But Your Kitchen Isn’t

August 15, 2016 by cookingupsomedough Leave a Comment

In A Pinch

Don’t you just hate it when you get ready to make the dish you’ve been planning for days, only to find that you are out of a certain item? Or, how about when you forget to take the butter out for it to get to room temperature?

I have to admit, most times that I’m in a bind in the kitchen, I just haven’t prepared ahead. Sometimes that means that I haven’t read the recipe ahead of time or I’ve decided at the last minute to cook something that sounds good but I haven’t shopped for.

Here are 5 kitchen hacks for those “in a pinch” moments.

1. Your Baking Powder is No Good

Unless you bake often, it is quite possible that your baking powder has been sitting in your pantry for a long period of time. It’s a good idea to test the effectiveness of that powder so you see that majestic rise in your baked goods. To test, mix 1 teaspoon of baking powder with 1/3 cup of hot water. If the baking powder is fresh, you will see lots of bubbles. If not, it’s time to replace.

If you find yourself with inert baking powder, for every teaspoon of baking powder needed, substitute ¼ teaspoon baking soda plus 1 teaspoon white vinegar as a replacement. The baking soda should be added to the other dry ingredients in the recipe and the vinegar added to the wet. You will not taste the vinegar. If your recipe already has baking soda, yes, you do add the additional baking soda. The reaction of the baking soda and vinegar will begin to take place as soon as you combine your ingredients and will be short-lived so wait to mix your batter until just before you begin the cooking process. If refrigeration is needed before baking, there should be no adverse effects.

2. Getting Butter to Room Temperature

Your first thought might be to microwave the butter but getting it to the perfect softened stage without melting it can be tricky. A better solution is to freeze the butter for a few moments and then grate it into a bowl. Cover with plastic wrap for 5 minutes. Remove the wrap and its ready to use.

Grate frozen or hard butter to soften it quickly for use in baking.

Grate frozen or hard butter to soften it quickly for use in baking.


3. Knife Is Dull

Besides being a nuisance to work with, dull knives can be dangerous. If you don’t own a knife sharpener, just grab a coffee cup and pull your knife blade across the unfinished ring on the bottom surface at a 45-degree angle several times. Check out this video tutorial to see how it’s done: How to Sharpen A Knife With A Coffee Cup.

4. You Need a Special Flour 

How to make your own self-rising flour and cake flour

How to make your own self-rising flour and cake flour

Most of us keep just one type of flour on hand for our everyday needs – all-purpose. The name says it all. For those times that baking calls for special flour, there’s no need to panic. Just mix up the flour you need.

Self-Rising Flour – For every one cup of self-rising flour needed, measure 1 cup all-purpose flour, add ¼ teaspoon salt and 1 ¼ teaspoon baking powder. Whisk ingredients together then sift 5-6 times. After sifting, measure the amount needed for your recipe.

Cake Flour – For every cup of cake flour needed, spoon 1 cup of all-purpose flour into a measuring cup, level off, then remove 2 tablespoons (put it back in the container it came from). Add 2 tablespoons of cornstarch to the measured flour. Sift 5-6 times and it will be ready to use as cake flour. Don’t forget to re-measure your final product before using since the sifted amount may be different than what you started with.

5. Lettuce is Limp

If you’re anything like me, you always have lettuce in the produce drawer but sometimes get tired of eating salads. If it’s been a few days since you last looked at your lettuce, it could be limp. To get it rehydrated and crisp for use, fill a large bowl with ice and cold water and add the juice of 1 lemon (about 3 tablespoons) or 1 tablespoon of apple cider vinegar. Plunge the lettuce leaves in the water and soak for 20-30 minutes. The mixture should bring new life to your lettuce. Remove the lettuce and dry the leaves before using.

What are some other problems you run into in the kitchen? Let me know in the comments below. I’d like to make this a regular series. Maybe we can work on a solution together.

Connect Now!

  • Facebook
  • Instagram
  • Pinterest
  • Twitter

Cooking is one of the skills that I am most proud of having. Cooking gives me the opportunity to offer the gift of hospitality to both friends and strangers, feeding people in times of celebration and in times of need. Cooking has also been a financial lifeline for me and my family. When money was short, I’ve been able to open my kitchen and “cook up some dough”. Join me here as we learn to make the most of our cooking skills for nourishment, fun and profit.

Read More

Categories

  • Baking Mistakes
  • Blog
  • Courses
  • Fixes
  • Freebies
  • In A Pinch
  • Recipes
  • Techniques
  • Uncategorized

Copyright © 2023 · Marion theme by Lovely Confetti DMCA.com Protection Status